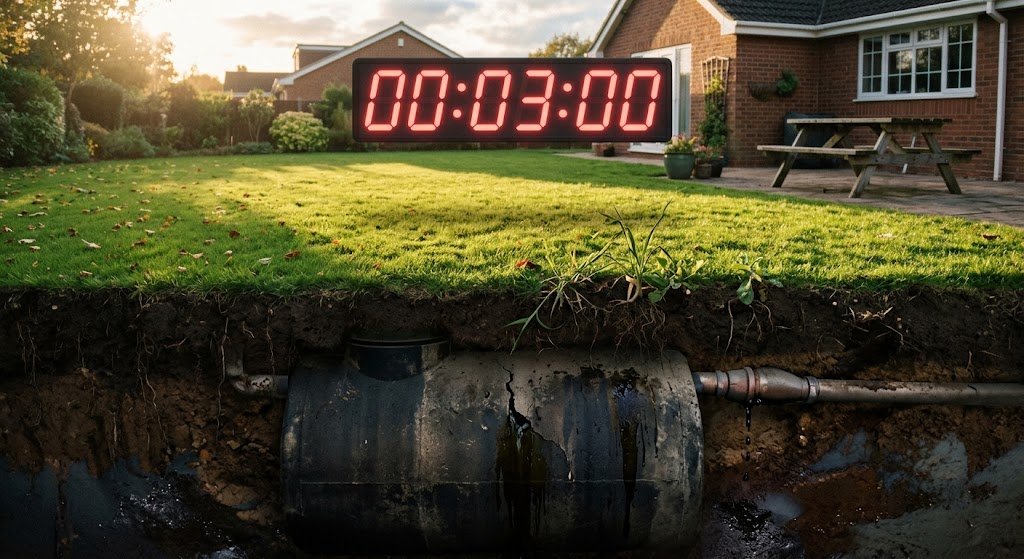
Out of sight, out of mind is a dangerous luxury when it comes to the ground beneath your feet. If your septic tank hasn’t been pumped or inspected in the last three years, a quiet, invisible countdown is ticking away right under your lawn toward a catastrophic septic tank backup. Your waste treatment system isn’t just a passive holding container; it is a finely balanced, living bioreactor. And when it breaks, it doesn’t happen gradually. It feels like it happens entirely overnight.
The fallout of a total systemic collapse is messy, stressful, and incredibly expensive. Homeowners regularly face hazardous indoor cleanups, ruined property, and sudden replacement bills ranging from $5,000 to $15,000. If your property requires an engineered sand filter or a complex mound system, that number can easily climb past $25,000.
To protect your home and your bank account, you need to understand how these underground systems actually work, how to read the subtle warning signs before a disaster strikes, and how to keep your infrastructure running smoothly for over 30 years.
The Hidden Physics of Septic Degradation: Why Most Systems Fail Overnight
Most people don’t think about their septic system until it stops working. To truly protect your home, you have to look closer at the fluid mechanics, distinct material densities, and microbial life churning away in the dark. When these elements fall out of balance, a perfectly good system can turn into a self-destructive mess remarkably fast.
Sludge Layer vs. Scum Blanket: The Biochemical Tipping Point
Inside a healthy concrete or polyethylene tank, gravity does the heavy lifting. It separates incoming raw sewage into three distinct, highly stratified layers:
- The Scum Blanket (Top Layer): A thick, floating mat of fats, oils, grease (FOG), and soap scum. This layer acts as a tight lid, sealing off the liquid surface below. By locking out atmospheric oxygen, it preserves the strict anaerobic environment that acid-forming and methanogenic bacteria need to survive and do their jobs.
- The Sludge Layer (Bottom Layer): A dense accumulation of heavy organic solids, undigested fiber, and spent microbial biomass. This is where anaerobic bacteria feast, slowly breaking down complex compounds into organic acids, soluble nutrients, and gases like carbon dioxide, methane, and hydrogen sulfide.
- The Clear Effluent Zone (Middle Layer): The relatively clear wastewater trapped between the scum and sludge layers. This clarified liquid is the only thing that should ever exit the tank and head toward your soil absorption field.
The system works beautifully until you hit the biochemical tipping point. As months and years pass without maintenance, the bottom sludge layer rises and the top scum blanket thickens, squeezing the clear effluent zone from both sides.
When this middle space shrinks, the liquid moves through the tank too quickly. The system loses its necessary 24-to-48-hour hydraulic retention time—the quiet window solids need to settle out of suspension. Instead of separating, high-velocity currents sweep raw, un-degraded solids straight out of the tank, causing catastrophic clogging downstream.
Effluent Filter Blockage: Signs Your System is Choking
Modern septic systems have a built-in safety net: an effluent filter housed inside the outlet tee cylinder. Think of it as a heavy-duty, high-density polyethylene micro-strainer designed to catch any stray particulates larger than 1/16th of an inch before they can ruin your lawn.
But when a tank goes too long without being pumped, an overwhelming mass of suspended solids hits this plastic mesh. As the tiny gaps choke with debris, your plumbing will begin to protest in very specific ways:
- Strange, rhythmic sounds: Distinct glugging or deep gurgling noises inside your walls or vent stacks when high-volume appliances, like your washing machine, drain.
- A sudden, system-wide slowdown: Multiple showers, sinks, and tubs across different rooms all draining sluggishly at the exact same time.
- Hidden pressure build-up: Wastewater backing up over the top of the inlet pipe inside your main tank baffle, which you can see immediately if you open the primary access riser.
The Soil Absorption Field (Drainfield) Saturation Threshold
The drainfield is where the final, crucial step of wastewater treatment happens. It is a network of perforated distribution pipes buried beneath your grass, embedded in washed gravel trenches or open, gravelless chambers.
The unsaturated, aerobic soil surrounding these trenches relies on oxygen and natural percolation to filter out harmful pathogens and neutralize contaminants.
When un-degraded solids and grease escape a neglected tank, they pour directly into the trench lines and coat the soil interface. This sudden, excessive flood of organic material triggers a massive overgrowth of anaerobic bacteria, which creates a thick, slimy layer known as a biomat.
A thin biomat is perfectly healthy and helps filter out bad bacteria. However, an unmanaged overgrowth will choke off the ground entirely, dropping the soil’s ability to absorb water to absolute zero.
Once this saturation threshold is crossed, the wastewater has nowhere to go. It backs up in the trenches, eventually forcing raw, untreated sewage to pool on your lawn or push backward into your home’s lowest drains.
The Definitive Septic Tank Pumping Schedule & Cost Matrix
Good intentions won’t save a septic system. Real protection requires shifting from guesswork to a concrete, mathematically proven schedule based on your actual household size and workload.
Household Capacity vs. Tank Volume Calculation Chart (1,000 to 1,500 Gallons)
The data below, compiled by the National Environmental Services Center (NESC), outlines the absolute maximum time (in years) you can safely wait between pumping cycles based on tank size and occupant load.
| Tank Capacity (Gallons) | 1 Occupant | 2 Occupants | 3 Occupants | 4 Occupants | 5 Occupants | 6 Occupants |
| 1,000 | 12.4 Years | 5.9 Years | 3.7 Years | 2.6 Years | 2.0 Years | 1.5 Years |
| 1,250 | 15.6 Years | 7.5 Years | 4.8 Years | 3.4 Years | 2.6 Years | 2.0 Years |
| 1,500 | 18.9 Years | 9.1 Years | 5.9 Years | 4.2 Years | 3.3 Years | 2.6 Years |
A quick warning: If your kitchen features an in-sink garbage disposal, you need to speed up this timeline significantly. Garbage disposals increase solid waste accumulation by roughly 50%, shortening a 4-person, 1,000-gallon pumping window from 2.6 years down to just 1.7 years.
Regional Pumping Cost Breakdown & Invisible Service Fees
For a standard residential tank up to 1,500 gallons, a routine pumping job usually costs between $300 and $700. However, homeowners are often caught off guard by extra service fees that pop up during the job:
- Deep Digging Fees: Most basic quotes include digging up about 6 inches of topsoil to reach the tank. If your main access ports are buried 12 to 36 inches deep without modern plastic risers, expect a manual excavation charge of $100 to $250.
- Extended Hose Surcharges: Standard pump trucks carry roughly 100 to 150 feet of vacuum hose. If your tank is tucked far back on your property and the truck has to park at a distance, companies will charge an extra $50 to $150 per 50-foot extension.
- Filter Maintenance Fees: Pulling out, pressure-washing, and reinstalling a heavily fouled, slimy internal effluent filter typically adds another $50 to $120 to the final bill.
Commercial-Grade vs. Residential Tank Clearance Protocols
A professional, thorough pumping job is about more than just dropping a vacuum hose into the nearest pipe and driving away. If you want your tank cleaned correctly, make sure your technician follows these exact steps:
- Utilize the Primary Access Riser: Pumping should always happen through the large, 20-to-24-inch center access riser—never through the narrow 4-to-6-inch inspection ports. Pumping through tiny ports can break internal baffles and leaves heavy sludge trapped in the corners of the tank.
- Liquefy the Settled Sludge: A professional will use a high-pressure water wand or an agitation bar to break up the dense, compacted layer of sludge at the bottom of the tank. This blends the solids and liquid into a smooth slurry, ensuring everything is thoroughly sucked out.
- Perform a Structural Wellness Check: Once the tank is completely empty, the technician should look inside with a high-powered light to inspect the concrete walls for cracks, verify that the intake and outlet baffles are intact, and make sure the outlet tee is perfectly stable.
Step-by-Step Emergency Assessment: Is Your System Backing Up?
When things go wrong, panicking only makes it worse. Acting fast can turn a potential disaster into a minor, manageable repair. Use this quick guide to figure out exactly what’s happening.
Identifying Micro-Warning Signs
Long before raw sewage shows up in your basement floor drains, your yard and plumbing will give you a few subtle, unsettling hints:
- Vibrant, Hyper-Green Grass: Noticeably lush, bright green patches or lines forming directly over your septic tank or drainfield lateral lines. This means your soil absorption field is failing, pushing nitrate-loaded effluent upward into the shallow roots of your lawn.
- Unpleasant Odors: A distinct, swampy, rotten-egg smell (hydrogen sulfide gas) drifting around your yard or near your roof vents, especially on humid evenings or when the barometric pressure drops.
- The Single-Fixture Bubble: Flushing a toilet causes the water level to rise, gurgle, or spit inside a nearby shower pan or bathtub drain.
Field Test: Differentiating Plumbing Clogs from Main Tank Saturation
Before you call an emergency plumber or a vacuum truck, use this simple check to see if you’re dealing with an isolated pipe clog or a full system failure:
- Find the Main Cleanout: Look for a 3-to-4-inch threaded PVC cap sticking out of the ground just outside your home foundation wall, between the house and the buried septic tank.
- Open it with Care: Put on thick gloves and protective eyewear, then slowly unthread the cap with a pipe wrench.
- Check the Liquid Level:
- If the cleanout pipe is completely dry and empty: The problem is just a local internal plumbing clog between your household drains and the yard. A standard plumbing snake or hydro-jetter will fix it.
- If the pipe is full of standing water or overflows: Your main tank is completely full or your drainfield is entirely locked up. The backup is happening at the tank entrance or further down the line, requiring emergency pumping.
Immediate Stopgap Measures Before the Vacuum Truck Arrives
If your system is backing up and you’re waiting for help to arrive, take these immediate steps to mitigate internal property damage:
- Shut Down Automatic Water Systems: Unplug your water softener, turn off automated irrigation systems, and pause any reverse osmosis filtration cycles that continuously drain water.
- Stop All Laundry Operations: A single load of laundry can dump 30 to 50 gallons of water into your lines. Stop running your washing machine immediately.
- Divert Your Graywater: If it is safe and allowed by local rules, disconnect your washing machine’s drain hose and route it into temporary utility buckets outside to keep that extra volume out of your struggling tank.
The Maintenance Protocol: Extending Tank Lifespan Beyond 30 Years
Keeping your septic infrastructure working flawlessly for decades comes down to managing your daily water use, landscape choices, and understanding the biological environment inside the tank.
The Enzymes vs. Chemical Additives Myth: What Biological Treatments Actually Do
The home improvement market is packed with monthly enzyme powders and chemical fixes that promise to completely eliminate the need for routine pumping. Biologically speaking, these claims don’t hold up.
- Chemical Additives (Solvents & Acids): Harsh chemical flushables or strong solvents can kill off the beneficial bacterial colonies inside your tank. Even worse, they can break down grease and heavy metals, causing them to liquefy and flow directly into your drainfield where they permanently clog the soil pores.
- Bacterial Additives & Enzyme Boosters: While these products do break down solids, they often liquefy the bottom sludge layer too rapidly before the bacteria can fully digest it. These floating micro-solids escape through the effluent filter, drift into the drainfield, and quickly ruin your soil’s absorption capacity.
The truth is simple: The human digestive tract naturally provides all the healthy bacteria your septic system will ever need. Skip the expensive monthly additives and protect your system by keeping harsh household chemicals, bleach, and paint thinner out of your drains.
The Targeted Biological Alternative: When to Use a Bio-Oxidizer
While standard monthly enzyme powders can prematurely liquefy sludge and flush micro-solids into your drainfield, there is a distinct clinical difference between passive enzymes and oxygen-releasing tablet treatments. If your system has been neglected, or you are trying to recover from an accidental chemical flush (such as bleach or harsh cleaners), introducing a controlled, oxygen-generating biological treatment can help stabilize the tank’s ecosystem without disrupting the stratified layers.
For homeowners looking for an engineered, non-destructive solution to safely boost their tank’s natural bacteria, Septifix Septic Tank Treatment Tablets offer a specialized approach.
Unlike standard liquids or powders, these solid tablets sink directly to the bottom sludge layer where they slowly dissolve. As they break down, they release millions of oxygen micro-bubbles and highly concentrated, safe bacterial strains directly into the compacted mass. This localized oxygenation destroys harmful anaerobic pathogens, neutralizes structural hydrogen sulfide odors, and safely accelerates the natural digestion of organic solids from the bottom up—helping you keep the clear effluent zone stable and avoiding premature drainfield failure.
Water Volume Management & High-Efficiency Appliance Calibration
Excessive water use is the most common reason drainfields fail early. Pushing too much water through the house at once creates a hydraulic surge that stirs up settled waste and forces solids into the yard. Try these smart habits to manage your flow:
- Stagger Daily Workloads: Avoid running the dishwasher, washing machine, and multiple showers all at once. Spread your laundry loads out across the week instead of saving it all for a massive “laundry day.”
- Upgrade to High-Efficiency Fixtures: Replace older toilets with modern 1.28 gallons-per-flush (GPF) models, and install low-flow 1.5 gallons-per-minute (GPM) aerators on your kitchen and bathroom sinks to cut down your baseline water use.
- Track Down and Fix Leaks: A single worn-out toilet flapper can quietly leak up to 200 gallons of water per day into your septic tank. Drop a few drops of food coloring or dye tablets into your toilet tanks to catch and fix leaks before they overload your system.
Drainfield Root Intrusion Prevention and Barrier Landscaping
Hungry plant roots will go to great lengths to find water and nutrients, and the perforated pipes in your drainfield are an incredibly attractive target. Once roots find their way inside, they can break pipes and create major blockages.
- Keep Your Distance: Ensure large trees and expansive shrubs are planted at least 30 feet away from your drainfield trenches. Never plant species with aggressive, water-seeking root systems—like Willows, Elms, Maples, or Aspens—anywhere near your septic infrastructure.
- Stick to Shallow Roots: The best cover for a drainfield is simple turfgrass, native groundcovers, or shallow-rooted perennial flowers. They stabilize the topsoil and encourage evaporation without ever threatening your buried lines.
- Install Physical Root Barriers: If you must have trees near your septic area, dig a trench and install a high-density, geotextile root barrier fabric infused with a specialized root inhibitor to safely steer growing roots away from your pipe network.
Managing a septic system is much easier when you have the right tools on hand. The following items can help you monitor your system, prevent blockages, and simplify your routine maintenance:
- Heavy-Duty Plastic Septic Tank Risers and Lids: If your tank’s access ports are buried deep underground, installing a durable plastic riser kit brings the opening up to ground level. This saves you from digging up your lawn every time you need an inspection or pumping service.
- High-Density Polyethylene Effluent Filters: Installing or upgrading to a high-capacity commercial filter (such as a Tuf-Tite or Polylok model) inside your tank’s outlet tee provides an effective line of defense against stray solids reaching your drainfield.
- Toilet Leak Detector Dye Tablets: A simple, non-toxic resource to keep in your utility cabinet. Dropping these tablets into your toilet tanks makes it easy to spot silent flapper leaks that could otherwise flood your septic tank with hundreds of gallons of unnecessary water.
- Commercial-Grade Geotextile Root Barrier Fabric: If you are landscaping near your septic field, using a thick physical root barrier along your trenches helps block aggressive tree and shrub roots from infiltrating and breaking your underground pipes.